
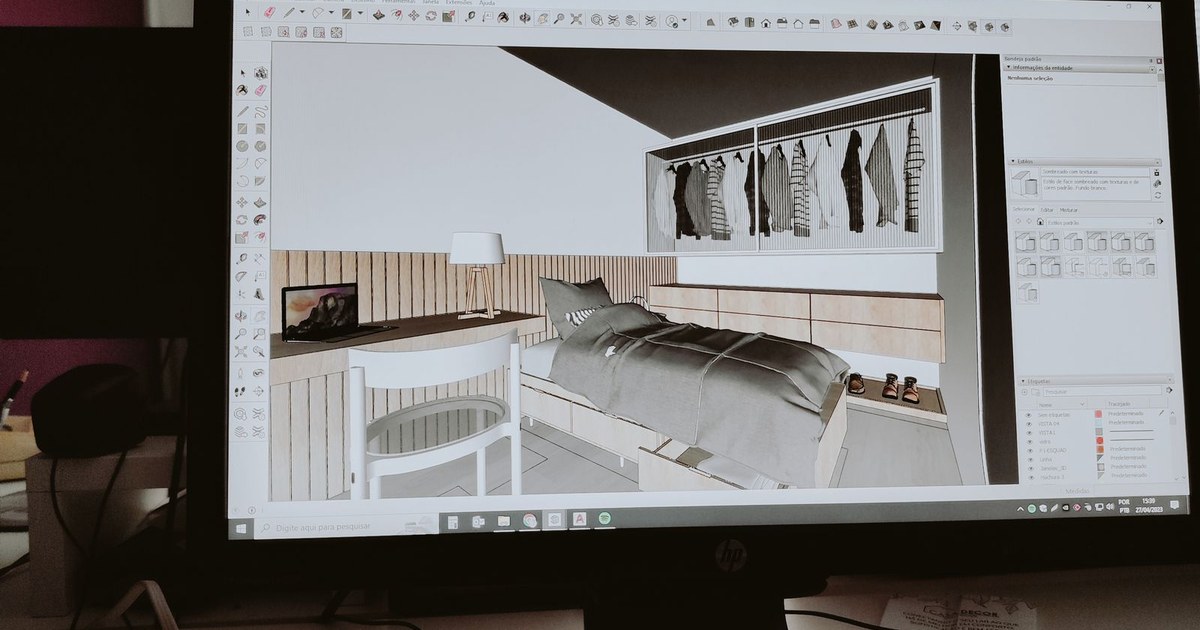
Drawings are precise and almost nobody outside the profession can read them. A client looks at an elevation, nods, and pictures something quite different from what the architect intends. That gap closes the day the structure goes up, which is the most expensive possible moment to discover it. 3D interior design visualisation exists to close it earlier. This guide explains what to ask for, what to actually check, and where visualisation earns its fee on a Kochi project.
Key Takeaways
- A render is a decision tool, not a marketing image. Its value lies in catching problems while changes still cost nothing.
- Check proportion, daylight, sightlines and clearances rather than admiring the furniture styling.
- Ask for visualisation at preliminary design stage, before approval drawings are frozen and long before fabrication begins.
What Visualisation Is Actually For
Most people treat a render as a picture of the finished result. It is more useful understood as a test. The question is not whether the image looks attractive but whether it reveals anything you would otherwise have discovered on site.
A model lets you stand in a room that does not exist yet and judge whether the proportion works. It shows how daylight enters at different times of day. It confirms that a wardrobe door clears a window reveal, that the television is visible from the sofa, and that the kitchen island leaves enough circulation. None of these are aesthetic questions and all of them are expensive to fix after construction.
It also settles disagreements. Households routinely discover during construction that two people had entirely different pictures in mind, and by then one of them has to be disappointed. A shared model resolves that conversation before money is committed. This is a genuine practical benefit that rarely appears in the sales description of 3D visualisation but is often the thing clients value most afterwards.
When in the Programme to Ask for It
Timing determines value. A render produced too early lacks the information to be meaningful, and one produced too late arrives after the decisions it should have informed have already been made and paid for.
The useful window is preliminary design, once plans are settled but before approval drawings are submitted and long before joinery is measured. At that point a change costs a revised drawing. Ask for a second, more detailed pass at material selection stage, when finishes are being chosen and the model can be used to test combinations rather than to confirm layout.
Producing a render after working drawings are issued has some value for client communication but very little as a design tool, because by then the contractor has priced the work and changes become variations. If a designer offers visualisation only at the end, ask why. The most common reason is that the render is being used as a sales image rather than a design instrument.
It is worth understanding what a render cannot tell you, so you do not place false confidence in it. It will not reproduce the exact colour of a finish, will not convey acoustic quality, and will not tell you how a space feels to move through at full scale. Treat it as a tool for testing specific questions rather than as a preview of reality. The Council of Architecture sets out the drawings that form part of a normal design appointment, and visualisation sits alongside rather than instead of them.
Static Images, Walkthroughs and What Each Is Good For
Different output formats answer different questions, and paying for the wrong one is a common waste. A set of still images and a moving walkthrough serve genuinely distinct purposes on a residential project.
Still images are best for judging a single view in detail, particularly material and colour combinations under specific lighting. They are cheaper and quicker to revise. A moving walkthrough is better for understanding how spaces connect, which matters in open plan layouts and in houses over two floors where the relationship between levels is difficult to grasp from plans.
For most Kochi residential projects, a small set of stills covering the main rooms plus one walkthrough of the public spaces is a sensible combination. Ask for views from where you will actually stand rather than from an idealised corner, because a render taken from a position no human can occupy tells you very little about how the room will feel.
Agree the number of views and revisions before work starts. Visualisation can absorb unlimited time if the scope is undefined, and a designer producing endless iterations at no charge will simply price it into the fee elsewhere. A defined package, typically a set of key views with one or two revision rounds, keeps the exercise proportionate. Additional views can always be commissioned later if a particular decision proves difficult to resolve on paper.
How to Review a Render Properly
Clients typically spend two minutes on a render and approve it. Spending twenty minutes with a structured checklist is where the value is realised, and it changes the conversation from an aesthetic reaction to a set of specific, answerable questions.
Check ceiling height against the furniture. Confirm circulation widths around beds, islands and dining tables. Look at where light falls on work surfaces rather than at the ceiling. Verify that every door and drawer can open fully. Check sightlines from the entrance and from the main seating position. Ask whether the render shows the actual specified materials or generic library finishes.
View it large. Colours read very differently on a phone, and a finish that appears warm on a handset can look cold on a wall. Where possible, look at physical samples alongside the render in your own light. Kochi alternates between bright sun and heavy overcast, and both conditions change how a surface behaves, which no render reproduces perfectly.
- Confirm circulation clearances, not just appearance.
- Check every door and drawer opens fully.
- Verify the render uses specified materials, not library defaults.
- Review on a large screen with physical samples alongside.
What It Costs and What It Saves
Visualisation is a small line in a project budget and is frequently the first thing cut when costs tighten. That is usually a false economy, because the changes it prevents are considerably more expensive than the service itself.
A set of interior stills for a residential project is a modest cost relative to the joinery it informs. A single avoided wardrobe rebuild, or one kitchen island repositioned on paper instead of on site, typically covers the entire visualisation fee. The economics are straightforward, which is why the service is standard practice on commercial work where budgets are scrutinised closely.
It is also worth asking what happens to the model afterwards. A well built model can be updated cheaply if the design changes, reused for marketing if you ever sell, and referenced during construction to resolve queries. Ask whether you receive the output files or only the images. For a project combining architecture and interiors, our interior and architectural design service includes visualisation within the design programme.
Keep the approved renders with your project file and refer to them during construction. They are useful for settling questions on site about what was intended, particularly where a drawing is ambiguous. Contractors generally welcome them for the same reason, since a three dimensional view resolves an interpretation question faster than a phone call. Store them alongside the drawings rather than leaving them in an email thread that nobody can find six months later.
Conclusion
3D interior design visualisation earns its place on a Kochi project when it is used early and reviewed properly. Ask for it at preliminary stage, check proportion, daylight, clearances and sightlines rather than styling, and view it large with real samples alongside. Used that way it consistently costs less than the single change it prevents. To discuss visualisation for your project, get in touch with our design team.